Equipment Calibration
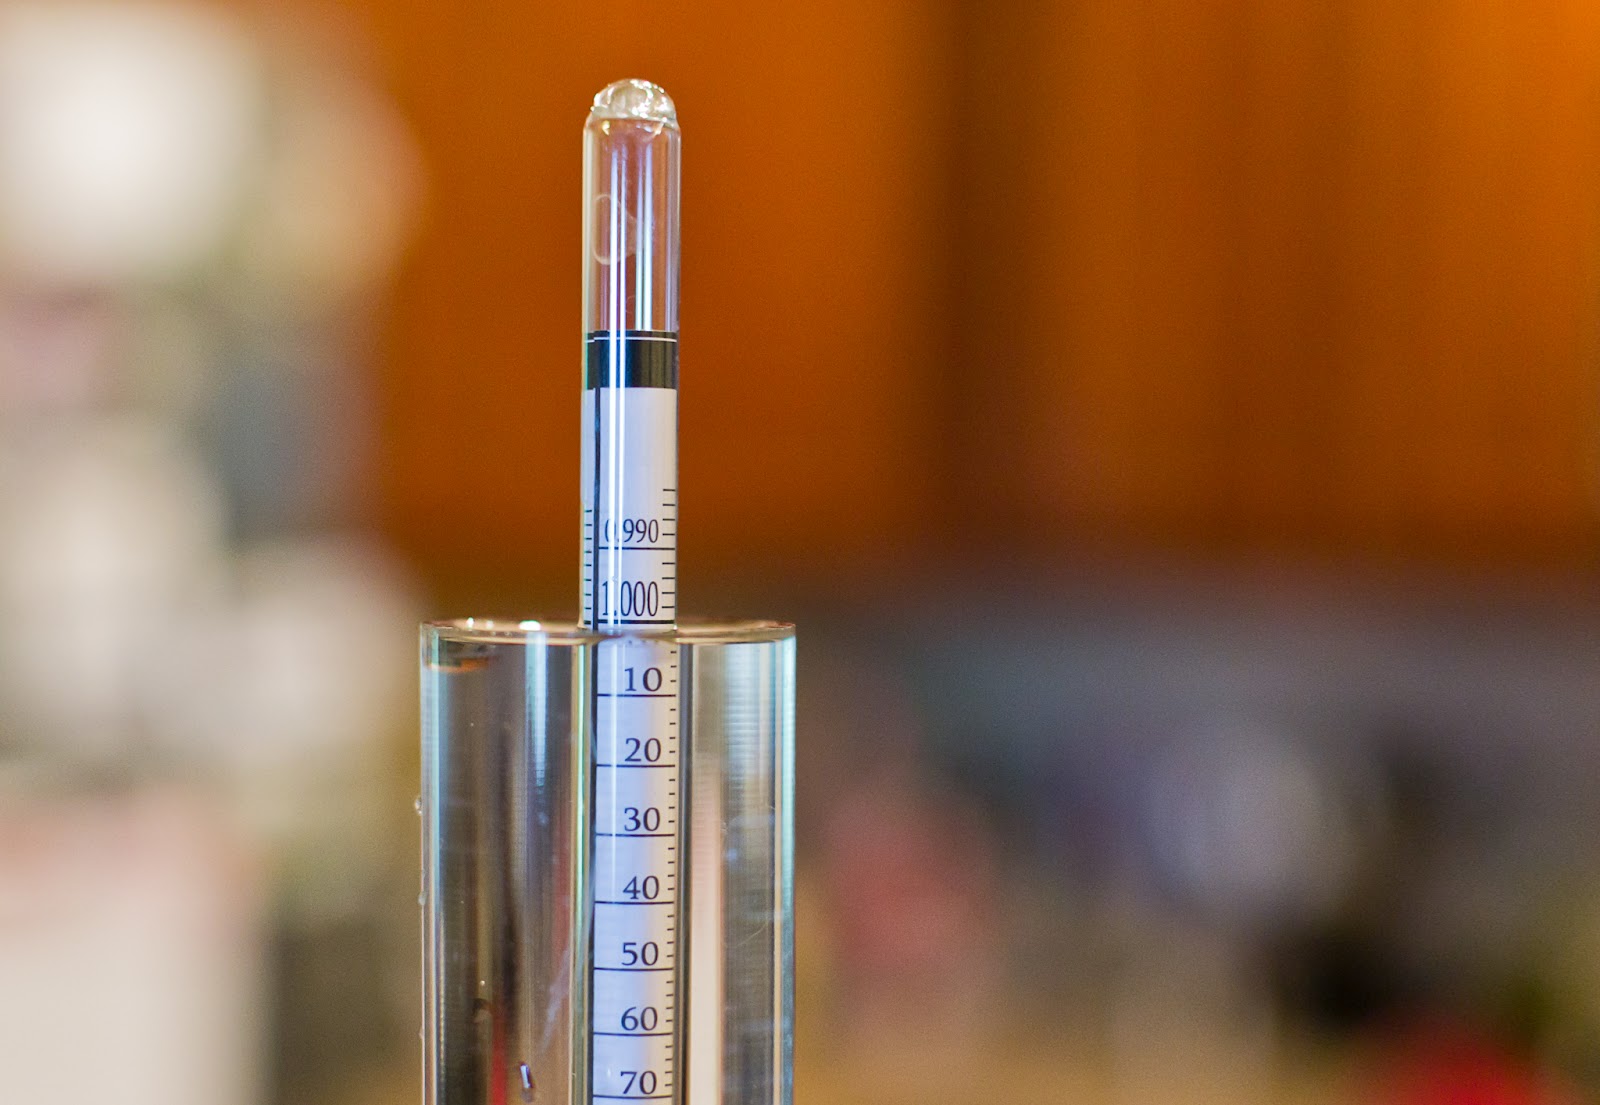
I don’t need to stress how much science is involved in brewing. We’re constantly taking measurements, temperature readings, and gravity readings. After running into various issues that didn’t make much sense, I learned that much of my equipment wasn’t calibrated correctly. My hydrometer was off, my thermometer was off, even my water level measurements were off.
Brewing with uncalibrated equipment is like shooting in the dark; sometimes you hit the target, but it’s hard to predict when you will. So here’s how to calibrate three key tools for your brew day; three that I learned to calibrate the hard way…
Vessels and Water Measurement
This is one of the most commonly overlooked, and commonly uncalibrated items in a home brewery. Your 36 quart pot most likely doesn’t hold exactly 36 quarts, and your fermenter bucket’s volume marks are probably quite a bit off. Many ‘efficiency’ issues, are usually water measurement issues. If you’re shooting for 1.059 at 5.5 gallons, and measure out 6 gallons mistakenly, you’ll hit 1.054. Perceived extract efficiency is very dependent on water volume, and your measuring device only needs to be .1 gallon off to account for 1/2 gallon of error with a 5 or 6 gallon batch.
Buy or borrow a known, good measuring cup. Even if it only holds two cups, that’s fine. Measure out exactly one gallon in whatever vessel you collect water in for your brew day (gallon jug, pitcher, fermenter bucket, etc), and mark with a sharpie where one gallon is. You now have a precise one gallon measuring device. Use that to calibrate both your fermenter (bucket or carboy), and your brewing vessels (HLT, MLT, Boil Kettle, etc). My fermenter bucket’s measurements are around 1/2 gallon low. That’s substantial.
Hydrometers
Hydrometers aren’t the most critical tool we use, but it’s still nice to trust their reading. Just like many brewers, I’ve broken a large number of hydrometers (I think I’m on number five now). And my current hydrometer is the first one that’s actually been accurate. All the others were between 1-3 points off when measuring water at 1.000.
Obviously we can’t cut open a hydrometer and move the scale inside, so there’s no calibration needed for a hydrometer. Although, you should know how far off your hydrometer is, and adjust your readings accordingly. Fill your hydrometer with distilled or RO water, and using a calibrated thermometer (see below), ensure the water is at the temp your hydrometer specifies (usually 60F). Measure the gravity of the water, it should read 1.000. If it reads anything other than that, that’s how far off your hydrometer reads. 1.002 in water means that your 1.054 wort is actually 1.052. Same goes for finial gravities. Two to three points can be a big change in FG; 1.008 and 1.011 are rather different.
Thermometers
Thermometers are really critical to our brew day. Being able to trust your thermometer is even more critical. I learned this early on in my home brewing career. I had three thermometers which were as low as 2* off, and as high as 11* off. The sad thing is: I actually trusted the thermometer that was 11* off. There’s nothing like mashing in at what you think is 155* to find out you’re actually at 144*.
The most feasible way for a home brewer to calibrate our thermometers is an ice bath. Every thermometer should read 32* in water that’s saturated with ice. It’s not as easy as throwing a couple ice cubes in glass of water though. Fill a cup with crushed ice all the way to the top of the glass. Then add only enough water to just cover the ice. That’s a proper ice bath. Any less ice than that, and your water won’t be 32*; you’d be shocked how high it will read.
Now that you know your thermometer is correct at 32*, test it with boiling water. Look up what temperature water boils at your altitude. As long as you’re within a degree or two, you’ll know that your thermometer reads within 1-2* across it’s entire range.

The instrument which is presented in this post presented a view of higher efficiency in the terms of applicability in work
Instrumentos De Medición
I am really impressed by this blog! Thanks for posting this work of yours.
Solder Paste Singapore | foaming stone